Waiting for my RepRap to be finished i could just as well get to know the Arduino hardware, so i installed the programming environment from Arduino on my Mac. That went real easy and it worked in the first try. Success!
What do you start out on with a new board/compiler ? Blink an LED of course! Looking in the /File/Examples/Basics/Blink there was a test program to blink the LED on the Arduino board. Worked just fine 🙂
Next i needed to try something a bit more exciting, so i dug up my trusty ‘ol PLED display (Organic LED) with a KS0066 controller (it’s HD44780 Compatible) and tried to get it work – no go, it simply wouldn’t work, so maybe it got damaged during moving my stuff – who knows.
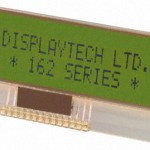
I whipped up some wires and a bit more standard LCD display, the 162COG-BA-BC and it worked fine.
But what is fun using a standard LCD – that has to be the oldest hack in the shed – apart from the Blinking LED example.
I knew i had some NOS VFD displays kicking around somewhere, that i got from a former employer. They was controlled by SPI bus and were 1×16 character standard ASCII.
I dug them up from my Display box (yep, i actually have two boxes ONLY with displays and display-related technology, among Nixie tubes etc.)
Tried getting them to work by adjusting the example suppled with the arduino found in /File/Examples/SPI/DigitalPotControl
It simply wouldn’t work reliably, i got i to show some very dim characters and it gave me a audible whine when i changed the display contents, but almost nothing was showing on the display.
Then i caught the smell of fish! – it turns out that two capacitors on these NOS displays was leaking Electrolyte all over the PCB and main switcher, i just hadn’t seen it. Incredible for NOS electronics that has never been used (i hooked these up for a short moment when i got them years ago, but otherwise unused)
Capacitors C4 (10μF/50V) and C9 (100μF/10V) seemed to be bad – especially the C4 (SMD) it was leaking all over the switcher. I replaced both and the display sprang to life immediately.
A datasheet for the display can be found here: CU165ECPB-T2J and here: CU165ECPB_T2J_specification
You can get my test routine here – it’s very ugly but it works.
UPDATE: After looking a bit around on the net, i actually found someone else that has been playing with the same display, just on a PCB from HP. You can find documentation and a library here


August 27th, 2016 at 01:11
Just wanted to thank you for the links to the datasheets. I looked all over for the more detailed datasheet and could not find including looking on the Noritake website.
I’ll be adding support for this display to my Arduino hd44780 library by creating a hd44780 emulation layer. The code is currently up and working including emulating hd44780 CGRAM updates to allow create of custom characters and will soon be part of the library.
Thanks again.
— bill
October 21st, 2025 at 14:54
Thank you to Bill for his library with support for this. Working great in 2025.